Using a Fork-Mount SCT on M42
(The Learning Experience)
A few years ago, in 1998, I bought myself a reasonably decent astronomical telescope, a Celestron Ultima 2000-8", and started my dabbling in astrophotography. Below I am going to share some of my experiences with you, just in case you are considering venturing along a similar journey and would like to know the pitfalls upfront.
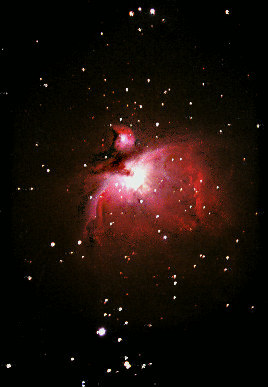
First, a description of the telescope. This is a fork-mounted Schmidt-Cassegrain with an 8" primary mirror, around 2000mm focal length at prime focus. Over time I bought various accessories, some useful, some quite useless, all quite costly. Moral of the story: do not believe all the advertising hype ;-) I can now image at f1.95 using the Fastar setup and an SBIG 237 CCD, at f6.3 and f10 using 35mm film or Canon Digital SLR cameras (or the 237), or at much longer focal lengths using eyepiece projection. Basically my choice of focal lengths extends from about 400mm up to about 24000mm. The good news is that, overall, this telescope has provided me a tremendously useful learning platform. It is fully computerized and thus it has also enabled me to find my way around the sky quite effortlessly. When hooked up to a PC or a laptop running "The Sky" software, the experience is quite a thrill; you always have a map on screen showing exactly where your scope is pointed. The scope is also of pretty high optical quality and you certainly get close to diffraction-limited performance centrally as, eg. my images of Mars or Epsilon Lyrae can attest. Testing it against a high-end refractor in daylight, a Televue 140 or a Canon 600/4 camera lens, does show up its weaknesses though. Off-axis its image field is not very flat and it is therefore not the instrument of choice for wide-field astrophotography, ie. of nebulae and such extended objects, the topic for this webpage. The scope and its fork-mount does an excellent job at photographing bright, narrow-field stuff like planets, and is also excellent for visual observation. It is weakest in taking long, tracked exposures. The mount is simply not quite up to the job. I have come to this conclusion after much struggle at getting decent images of the brightest nebula in our night sky, M42 in Orion. Optically, it remains excellent value for money. A naked (no mount) 8" SCT optical tube assembly can cost as little as $1000. A high-end refractor of only 5 or 6" aperture already runs into $5000+, while the Canon 600/4 lens (6" aperture) is at $8000! On planets, the 8" SCT out-resolves all of these... When it comes to sheer resolution, aperture inches do matter. Anyway, here is a record of my battle with M42. First attempt was made soon after receiving the scope. Stuck a camera with ISO 800 Fuji colour-print film and banged away with an f6.3 focal reducer, with the scope tracking in alt-azimuth configuration. Perhaps it was just beginner's luck, but one of the many 1-minute exposures yielded this quite nice image, of course, with a lot of contrast stretching and some minor clipping-off the trails on the brighter stars:
Despite what you may read elsewhere, field rotation is no big deal for individual exposures of a minute or less, especially if all you are aiming for is web-sized images. With suitable software it's also not a major issue to stack a whole bunch of short exposures that are slightly rotated with respect to each other, ie. to de-rotate them later. But alt-azimuth tracking is not at all smooth, so I had to buy an equatorial wedge, hoping for longer exposures. Note: hoping! Something to note regarding image size: A standard T-mount adapter ring has a clear ID of around 40mm, but a 35mm frame has a diagonal of 43.3mm, so vignetting is unavoidable. Taking into consideration also the optics of SCTs, it is reasonable to keep in mind a maximum image size of 24x24mm on 35mm format when shooting extended objects. Owners of DSLRs with 1.6x crop factors, such as the D30, D60, 10D, need not worry about vignetting at all.
I then acquired an SBIG 237 CCD astro camera. This has only 640x480 pixels but it does have the advantage of cooling, to minimise noise, and you can also equip it with an internal RBG filter wheel. Because the sensor is so tiny you end up with a crop factor of about 7x compared to 35mm film. Hence you can get images that look quite close-up. Rather tiny for prints, but adequate for the web. But even with an equatorial wedge the tracking did not allow for long exposures. Here is the bright central region in the above photo, ie. the Trapezium taken by the SBIG 237 plus RGB filters:
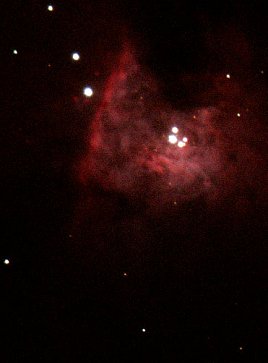
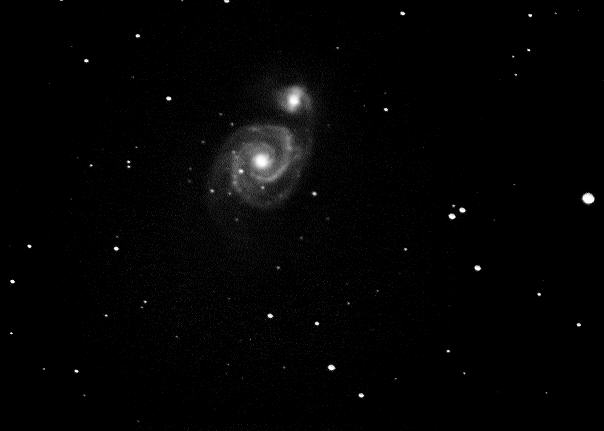
I had to take a lot of frames to end up with the bare minimum for the RGB compositing. The good optical quality of the SCT is quite apparent in the above photo. Note that not only are the four Trapezium stars well resolved (each pair is separated by about 12 arc-seconds) but you can almost see another couple of stars making their presence known. So, how convenient is the 237? Not at all! Unless your home is at a dark sky site. To take any decent astroimages of the faint fuzzies you need a reasonably dark location, say magnitude 4.5 or better. Perhaps the biggest nuisance is that you also need a laptop to do any imaging. This adds to the equipment bulk you need to transport to your dark location quite substantially (table + laptop + its power supply + 237 + scope&mount + + +). Many dedicated people do go through such heroic efforts and succeed. But for me, a Digital SLR seems to be a lot more convenient if you are contemplating any travel at all to get to a dark sky location. The 237 does have a much advertised Track-&-Accumulate mode. Does it work? Yes, but again you still need a pretty good mount. You see, to get good images you need each shot to be, say, a minute long. 15-second shots simply do not have much signal in the fainter parts of your nebula. My fork-mount simply never delivers a well-tracked 60-second shot through the scope, even at a 400mm focal length. Never mind contemplating stacking 10 of these! Let's say you are all set up to auto- T&A 60 shots of 30-seconds each. If nos. 15 and 37 are mistracked, there goes your entire stack! So you are forced to keep on trying with ever shorter exposures. Before you know it you are down to 15 seconds each, but now you need a stack of 120 instead of 60! And even then you may have to try several times. In conclusion, despite the ad hype, you do need an excellent tracking mount, even with stacking. The more light polluted your site is, the longer the exposures you need to get decent Signal-to-Noise ratios after subtracting out the background pollution. Here's an example of what is possible at a moderately light polluted site (my rooftop) and half a night's effort, M51 using T&A at f1.95 (390mm focal length), just the L image. I was planning on going for an LRGB, but the light pollution, combined with the much longer colour exposures required (even with binning) made me give up at the L :
The colours that end up in your final composite image using sequential RGB filtration are also very sensitive to the ratios you assign for combining the images. I had obtained the ratios for the Trapezium image by trying to calibrate the filters in daylight and looking at skin tones. Way out, as we will see shortly. While reams have been written regarding colour-calibrating with G2 stars, etc, it is not so straightforward, and I suspect many beginners end up cheating and simply editing in Photoshop to get their colours to match other people's. This is a convenient point to move over to the Canon DSLRs, reputedly having excellent colour rendition, at least for normal photography.
First, the Trapezium using the hopelessly-too-noisy-for-faint-fuzzies Canon EOS D30, 2x8sec @ISO 1600, 1:1 crop, Daylight White Balance:
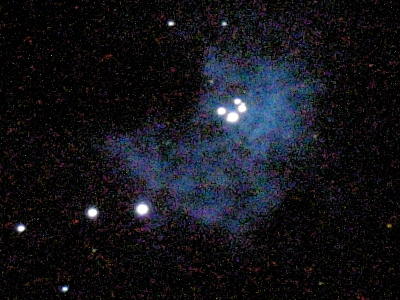
We notice instantly that the Trapezium has a blue, not a red, nebula background! Can this really so? While the D30 remains excellent for planetary/lunar photography, in 2003 I upgraded to the Canon 1Ds DSLR and we get the blue colour confirmed (Note the low noise even in this 1:1 crop):
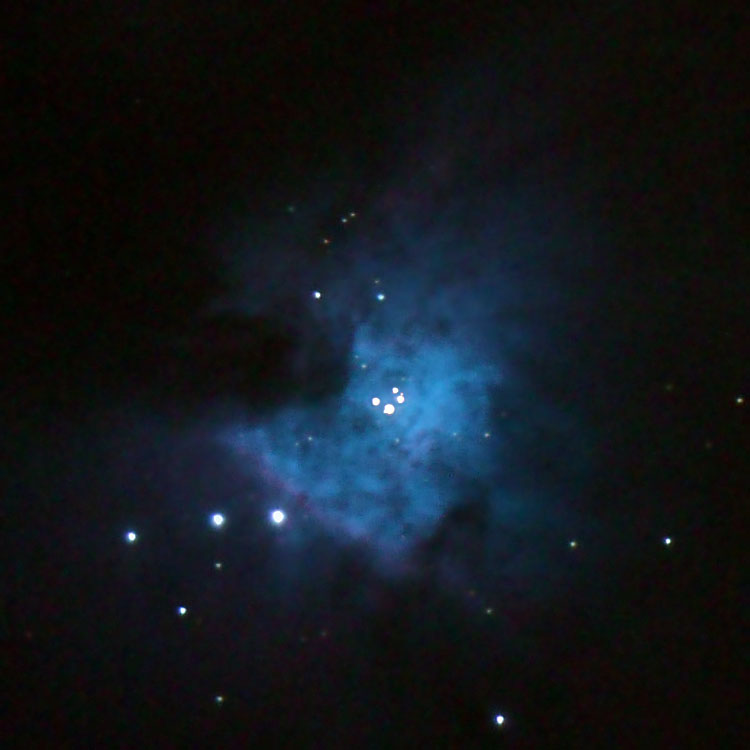
Because of my tracking difficulties the above is a composite of 4 exposures at f10 adding up to a total of only 58 seconds @ ISO 1250. Shooting at f6.3 is a bit more forgiving of tracking errors and I managed to obtain, after many tries, four decent frames of 30sec each, @ ISO 1250:

Again I had used Daylight White Balance. My local light pollution adds an overall strong crimson cast to each image. The colours you see above are what's left after the crimson is subtracted. The central Trapezium region remains blue but the outer regions indeed go H-alpha reddish. Basically the 1Ds is a very good astro camera, hugely more convenient and more sensitive than the SBIG 237, with a huge usable pixel array (even the crop to 24x24mm for vignetting still leaves 7.3 MegaPixels). It's also easily transportable to a dark sky site. The SCT weakness in tight star images as you go off-axis is also clearly apparent in the above photo, even if you try to allow for mistracking. I have tried piggy-back photography with ordinary camera lenses on many occasions. My Celestron fork mount tracks well enough for 20-minute exposures on grainy ISO 800 film with a 14mm lens (see my ultra wide angle Milky Way shots) and even with the much more demanding 1Ds I can get a reasonable yield of 2-minute exposures with a 100mm lens:

The full 1Ds frame using a Canon 100/2.8 macro USM lens at f2.8 is shown in the middle (6 exposures stacked, adding up to 8 minutes total) with 1:1 crops of the Flame Nebula on the left, and M42 and M43 on the right. One day I'll attempt longer exposures at a dark enough site... In the meantime I'll be dreaming of getting a good German Equatorial Mount so that I can tackle these faint fuzzies adequately :-)
For other stuff visit Samir's Home
To drop me an e-mail just
click on:
samirkharusi