Help with Scanning your Old Photos
(also down-sizing your digital photos for email use)
OK folks, for people with no clue, keep this for future reference, i.e. put it in your "Favorites". That's the button above, in your Explorer Window. Yes, there are different levels of cluelessness...
When you transmit photos over the internet you are limited by file sizes. Nobody wishes to be sent a photo that is more than a mega byte in size, just clogs up his email in-box and hard drive. The file size for a photo is determined by physical size (how many inches or pixels wide), resolution (dots per inch, dpi) and by the compression used. The most effective way of reducing the file size for a photo is by simply making it smaller (width or height in pixels), followed by the format you save it in (most effective is JPEG or .jpg, followed by how much compression you use in conversion to .jpg:
1. The resolution you use in the scanner (normally this can be varied from 50 dpi, dots per inch, to even 4000+ dpi in high-end scanners). Use 300 dpi for prints. 300 dpi captures all the details that a print will have and all the detail your perfect eyesight can see on a print. Only the original negatives or slides will contain more detail. If you are scanning negatives or 35mm slides use 1600 to 4000 dpi. The resolutions I quote here are high enough that the recipient can make prints as good as the originals and are what you should use to burn to a CD to take to your local photo store for printing. In general these resolutions are far too much if all you want the other chap to do is to see the pics on his PC monitor. But use these resolutions to record your master scans for posterity. You do not really wish to have to redo the scans later.
2. If the original is monochrome, Black and White, you can immediately shrink the file size to a half or a third by scanning in "grayscale" instead of colour.
3. If you are going to manipulate the images, trying to improve them beyond the original, in Photoshop or similar software, "Save" your scans as uncompressed 16-bit .tif (or Tiff) for monochrome or 48-bit .tif for colour. These will be HUGE files, many megabytes each, suitable for any digital manipulation you wish to do, now or in the future. They are NOT for sending electronically to anybody else. Otherwise "Save" them as Max Quality .jpg (JPEG) and they will still make excellent prints and will be good enough to keep for posterity. Only reason to use 16-bit or 48-bit tiff is to enable you to use the maximum possible digital manipulation with the least amount of degradation and artifacts in the final product. One day you may become an expert at photo-editing and you do not wish to have to redo your old scans, if you had originally saved those scans as multi-megabyte tiff files. Mind you, 48-bit tiff files can quickly fill up your hard disc. So it is probably prudent to save these pro-quality scans to a DVD and keep your hard disc available for other junk.
4. The above tiff are your master files, to keep permanently on your PC or on DVDs, NOT (!!!) for the internet. Now you wish to get the files ready for the internet. Most PC monitors have a display that is 1280 pixels wide or smaller. There is NO point in emailing anyone a photo that is more than 1200 pixels wide, in fact for most people 1000 pixels will already be about the max width they can view on their monitor without scrolling horizontally. A good max size for an email photo is 1000 pixels wide by 750 pixels high. These files will also be large enough for the recipient to make excellent 6"x4" prints if he so wishes. So, whatever size your master scans were, and after you have edited them in Photoshop for any defects, contrast, colour balance, whatever, it is now time to reduce them in physical size. Resize each file (in Photoshop or similar) to a max width of 1000 pixels or a max height of 750 pixels. Now, "Sharpen" the resized versions and "Save" them as .jpg (JPEG) at 80% to 90% quality. The resultant file size should be between 100k and 500k, the images will look great on the monitor and you can be proud of your work. If the file size is too large, unlikely, you can reduce the Quality to 70%. The Quality range 80 to 95% is safe to play with; higher Quality = larger file size. But remember, try to keep each file size to no more than 300k or thereabouts. OK, max 500k for group photos that contain loads and loads of details.
Do NOT email any photos in .bmp format. It's an ancient, lousy format that gives huge files of low quality. Do NOT email any photos in .tif format. This is an uncompressed format that is excellent for your own archives when you want to manipulate images or retain them for posterity. The final, edited/manipulated version should be "saved" in .jpg ("max" quality for your own use and to burn a CD for prints at your local Wal-Mart, 80 to 90% quality for web use).
Most of us are too lazy to do these things carefully enough and many recent-model scanners try to automate all the above for you. If you are in the market for a new scanner I recommend getting a Canon (model numbers change frequently) for around $60. I own a Canon LIDE 20 that plugs into your USB port. It does not even have a power cord! It has 3 buttons. You push one button and you get your email jpeg instantly ready for transmission, or another button and your printer puts out a beautiful colour copy instantly, or use the third button if you want to be fancy and know what you are doing. All for $50. Here are some examples from old prints scanned by the Canon $50 scanner, displayed at about the max useful size for PC monitor display, yet the B&W files are each under 60k in size and the colour image is only 131k in file size, following all the above steps:
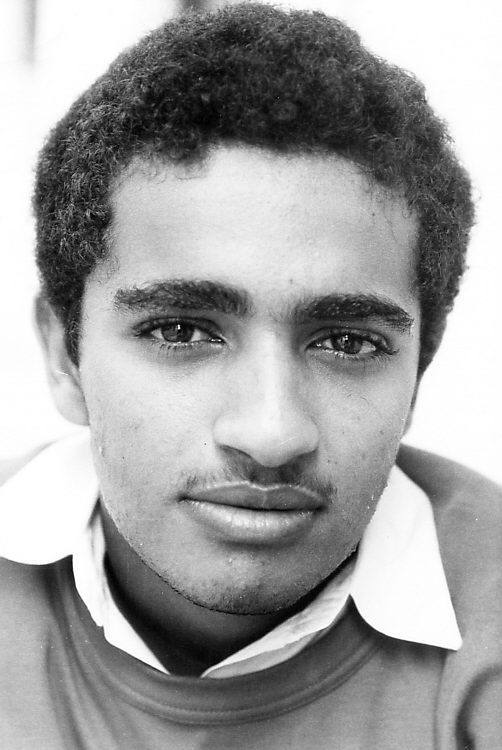
Here's my self-portrait taken, most likely, in 1962, before I started shaving. Yes, many of us did pass through the pimply phase:
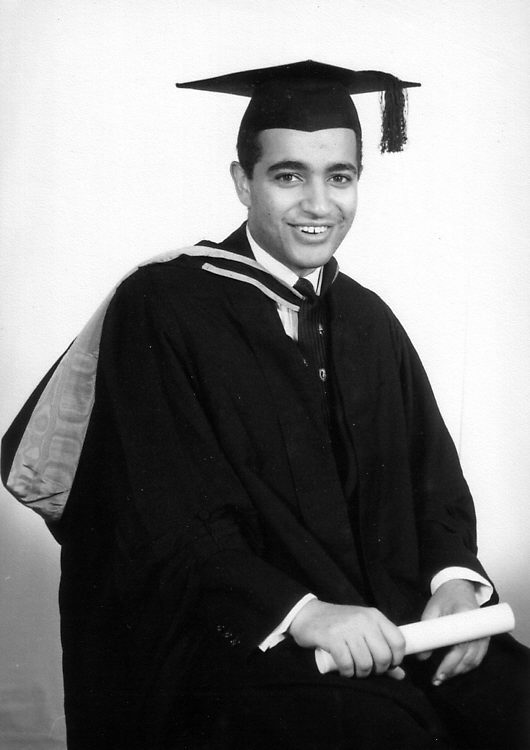
And here's myself at graduation, BSc from Birmingham University in 1966. For some reason I do not have photos from my MSc and PhD graduations. One becomes blaze and cynical in one's twenties, and nostalgia reigns from age 60 onwards.
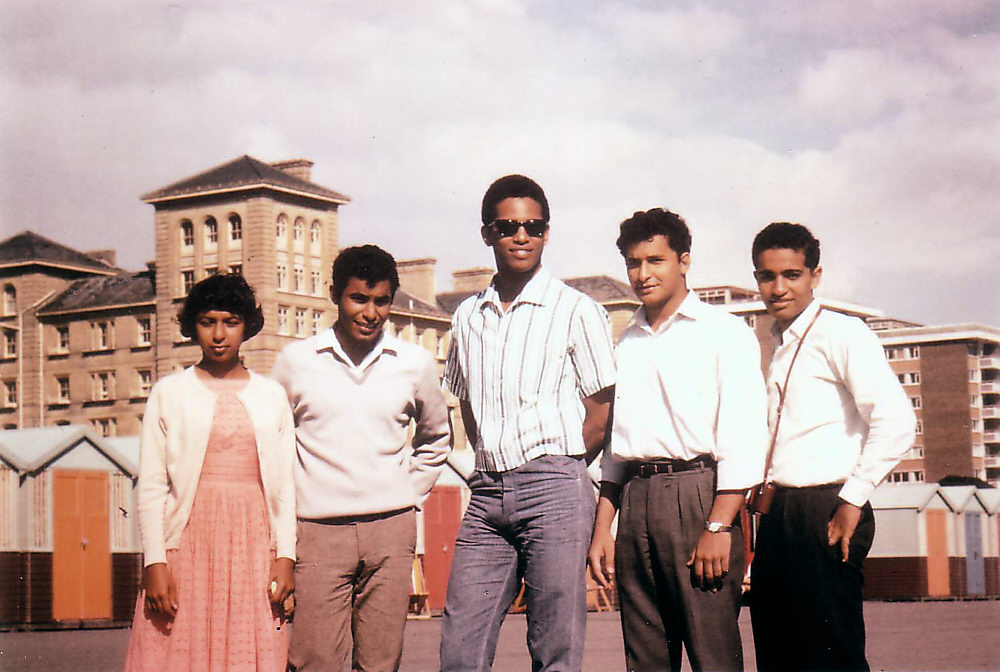
A faded 4"x6" print from Brighton, England in the summer of 1964. Rahima, Mhelleb, Talib, Zein and yours truly with colours and contrast rejuvenated through digital post processing:
All the above will print very nicely at up to A5 size. It is not necessary to clog up the email in-boxes of your correspondents. Do the same down-sizing for those photos spewed out by your digital cameras and keep everyone content and looking forward to receive your pics :-)
Summary:
TIFF files are only for your archives. Every now and again clear up your hard disc and save the lot onto a DVD for archiving.
Email: Use a max size of 1000 pixels wide or 750 pixels high, whichever gives the smaller image. Sharpen the downsized image and "Save" it as a JPEG at 80 to 90% quality.
To order prints at your local Walmart or Photocentre: Do NOT downsize your camera output or your scans. Just edit them as you wish in your favorite photo-editor like Photoshop or whatever, and then "Save" them as .jpg at max or 100% Quality. This way you can fit a very large print order onto a single CD without messing up the quality with jpeg compression artifacts.
Additional comments: You
can set your Windows Screen Saver to show all your photos in a given folder as a
random slide show (I call my folder "Picture Frame", and it already contains
several thousand photos). For these images, use a size that is as wide in pixels
as your monitor, e.g. most people have monitors that are 1200 or less pixels
wide, so for this purpose a 1200 pixel wide image is perhaps large enough, but
one day you are likely to purchase a High Definition TV. These TVs have
resolutions of 1920*1080 pixels, and often you can also use them to view your
thousands of photos over the next several years. A Sony Playstation 3 hooked up
to an HD TV does a fantastic job of automating a slide show, but any PC can also
be hooked up to most of the better HD TVs. Some HD TVs have a slot for memory
cards to view photos directly. Consequently it's better to generate your Picture
Frame folder only once, whether it ends up being used as a screen saver from
your PC to its own monitor, or when you wish to watch your kiddies growing up on
your future huge HD TV. For this purpose it is best to resize all your photos to
1920 pixels wide or 1080 pixels high, sharpen and save them at max quality jpeg.
You should then be all set for the next decade. Trying to make these Picture
Frame folders with the original multi-megabyte files at the size they come out
of your digicam is of course also possible, but the gigabytes ramp up very
quickly. Downsize them to 1920 pixels wide and you will end up with something
manageable over the next several years.
For more stuff return to Samir's Home
To drop me an e-mail just
click on:
samirkharusi